Welcome back to my blog, and my first post of 2017! Today I thought I would properly round off the year with my ‘Best Products of 2016’. I loved seeing everyone’s version of this tag in the blogging community and on YouTube, and I couldn’t resist sharing my own list! I tried to include at least one of my loved products from each part of the face, i.e. eyes, mouth etc… It was definitely hard to pick! I hope you like this post, and that it might give you some ideas of new makeup to try out! Let’s get onto the tag…
- Primer:
One Step Correct– Stila: The mixture of pink, green and white colours that are swirled together in this primer really help to colour correct the face before applying foundation. I especially like the green colour as it cancels out the red pigmentation in my skin. Also, the primer has a sticky consistency that helps the makeup cling to the skin and stay all day! 
The Porefessional– Benefit: This is another primer I loved throughout 2016! I mainly focus the product on my T-zone area; it mattifies the face whilst also filling in pores to ensure the skin is smooth before applying foundation. It also feels great on the face and definitely does what it says on the tin! I am on my third mini of this primer, and I am still loving it just as much!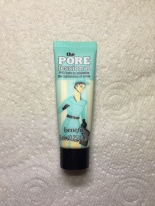
2. Eyes:
Roller Lash Mascara– Benefit: This product has been a constant ‘go to’ when doing my everyday makeup in 2016. It helps to increase the length of the lashes, whilst also giving them a natural curl. This mascara is definitely buildable if a more intense look is desired! This is a product that I will still be using in the upcoming year.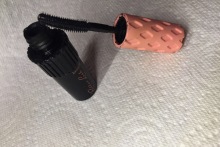
Cocoa Blend Palette– Zoevea: This palette has to be one of my all time favourites. I absolutely love the warm colours that are perfect for creating quick and simple looks, as well as the matte white/cream shade, which I use everyday to set my eyeshadow base. It is a product I constantly reach for, and the only eyeshadow palette where I have hit pan! I have recommended this palette to friends as it I affordable, yet still pigmented and blendable! LOVE LOVE LOVE.
Modern Renaissance Palette– Anastasia Beverly Hills: One of my favourite high-end makeup products of 2016 has to be this palette. I was lucky enough to receive it as a birthday present from my brother in the summer, and since then have loved creating makeup looks with it. The colours are beautiful, the pigment is amazing, and the texture of the shadows is so rich/creamy that they blend seamlessly! My favourite colours have to be the pinks; they’re gorgeous… the palette is definitely worthy of the hype it gets!
3. Eyebrows:
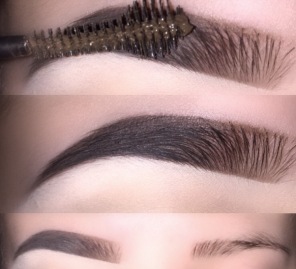
Dipbrow Pomade– Anastasia Beverly Hills: I purchased this product early 2016, and haven’t looked back since! I can’t believe that there was ever a time that I didn’t use this product for my brows. Before the pomade, I had struggled matching the colour of my eyebrows with any product, but the ‘Ash Brown’ shade by ABH is the perfect fit. The product is highly pigmented, which took a bit of getting used to at first, but after practice I can safely say it is the best eyebrow product I have ever used, especially to create the popular ‘gradient’ effect. Also, the fact that it’s pigmented means a little product goes a long way; I am only on my second pot! Not to mention that it is water proof so lasts all day. I get no end of compliments on my brows when I am wearing this product, 10/10 would recommend if you are looking for a new piece of makeup for your brows.
4. Face:
Soft and Gentle Highlight– Mac: This popular highlighter has been my favourite to use during 2016. It gives a lovely golden glow with a shimmer effect that goes with any makeup look. Also, I find that a natural gleam is achieved with one layer of this highlight, but as you build it up, it creates a more intense look. Despite the fact that my highlighter collection has now grown, I definitely will still be using this product!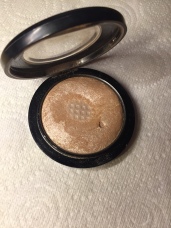
Rockateur Blusher– Benefit: My most used blusher of 2016 has to be my Rockateur blusher. It is a beautiful deep rose gold colour, with cream and gold fleck that compliments any warm toned eye/lip looks perfectly. I shall definitely been repurchasing when mine runs out!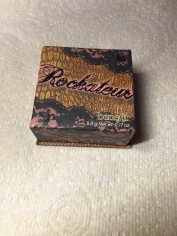
Lasting Perfection Concealer– Collection 2000: This product has been on my most used list for a long time now! Over the year I have repurchased this concealer (in the shade fair) numerous times; it is affordable yet high coverage, and certainly feels like a more expensive product! The colour is great for highlighting high points on the face, not to mention that it blends easily with my beauty blender. I think it is a product that I will continue to buy for the foreseeable future!
5. Lips:
Dolce K Liquid Lipstick– Kylie Cosmetics: Liquid lipsticks have been a massive makeup trend during 2016, with most brands creating their own versions. My best friends (who know I love makeup) generously gave me a Kylie Jenner Lip Kit for my birthday in the shade ‘Dolce K’, which is a cool toned brown colour. The texture of the product is very smooth, and I find that it applies very easily. The colour is perfect for creating a sultry look, but also it can be warmed up for day time makeup by using a different lip liner ( e.g. ‘Stone’ by Mac). The lip liner that comes with the kit glides on the lips and has a creamy consistency, unfortunately mine has broken, but I still love it! Additionally, I really like the sweet almost marshmallow smell, as it isn’t to overpowering. Although this product has gotten mixed reviews, I personally give it a big thumbs up!
Velvet Teddy Lipstick– Mac: At the start of 2016 my ‘go to’ lipstick was definitely ‘Velvet Teddy’. It is the perfect matte nude shade that goes with so many different looks. The consistency isn’t drying either with is definitely a bonus! One of my favourite lipsticks, as I am sure it is for many of you! 
Soft Matte Lip Cream– NYX: This lip cream in the shade ‘London’ was the only thing I wore on my lips for months during mid 2016! It provides a natural colour to the lips, that is very wearable for more day-to-day looks. The texture, as the name suggests, is creamy and the colour does last on the lips for a pretty long amount of time to say it is an affordable drugstore brand product! Since I purchased ‘London’ my collection of Lip Creams has grown, and I think it will continue to during 2017.

This concludes todays makeup post! I can’t wait to try out and use more products this year, and I look forward to seeing what makes it onto the list of ‘Best Products of 2017’.
Thanks for reading,
Chloe x